Overview
In this article you will walk through how to create an account for Google Tag Manager, Create New Tags and How to add Tags to your Home Page Filter.
Steps
Add a New Account
- Login to https://tagmanager.google.com
- Select Create an Account
- Fill in your Account Name
- Container Name will be the same of your video library
- Target Platform: Web

- From the <body> code, identify and copy just your Google Tag Manager (GTM) ID. it will look like: GTM-XXXXXXX

Add GTM Account Information to webcastcloud
- Login to webcastcloud Admin
- Under Settings >Integrations >Google Tag Manager
- Simply paste in your GTM ID
- Save
Your webcastcloud video library is now configured with your GTM. Although you will need to continue through the following steps to capture more insights from your visitor activity.
Create New Tags
-
Click on new tag

-
Create a Name for your tag
-
Click the selected area to select tag type
-
Select Google Analytics: GA4 Configuration
-
You will see following page


- To get “Measurement ID” you need to create property on Google Analytics. Below are the steps
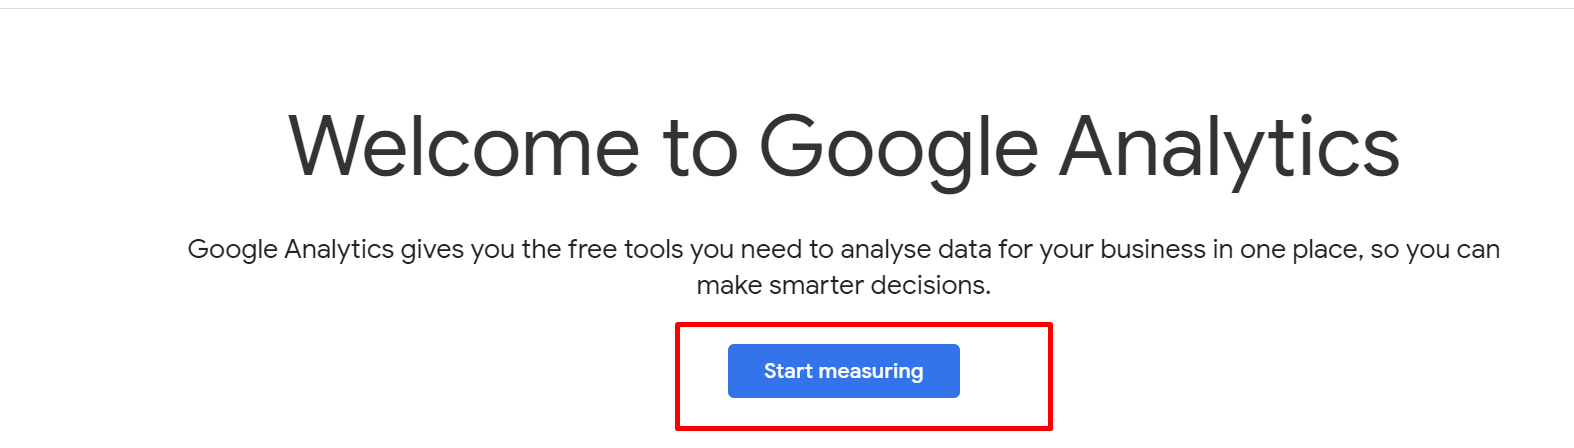
- a. Visit this link Google Analytics
- Click on start measuring
-
- Enter name of account and name something relevant
- Setup property for analytics
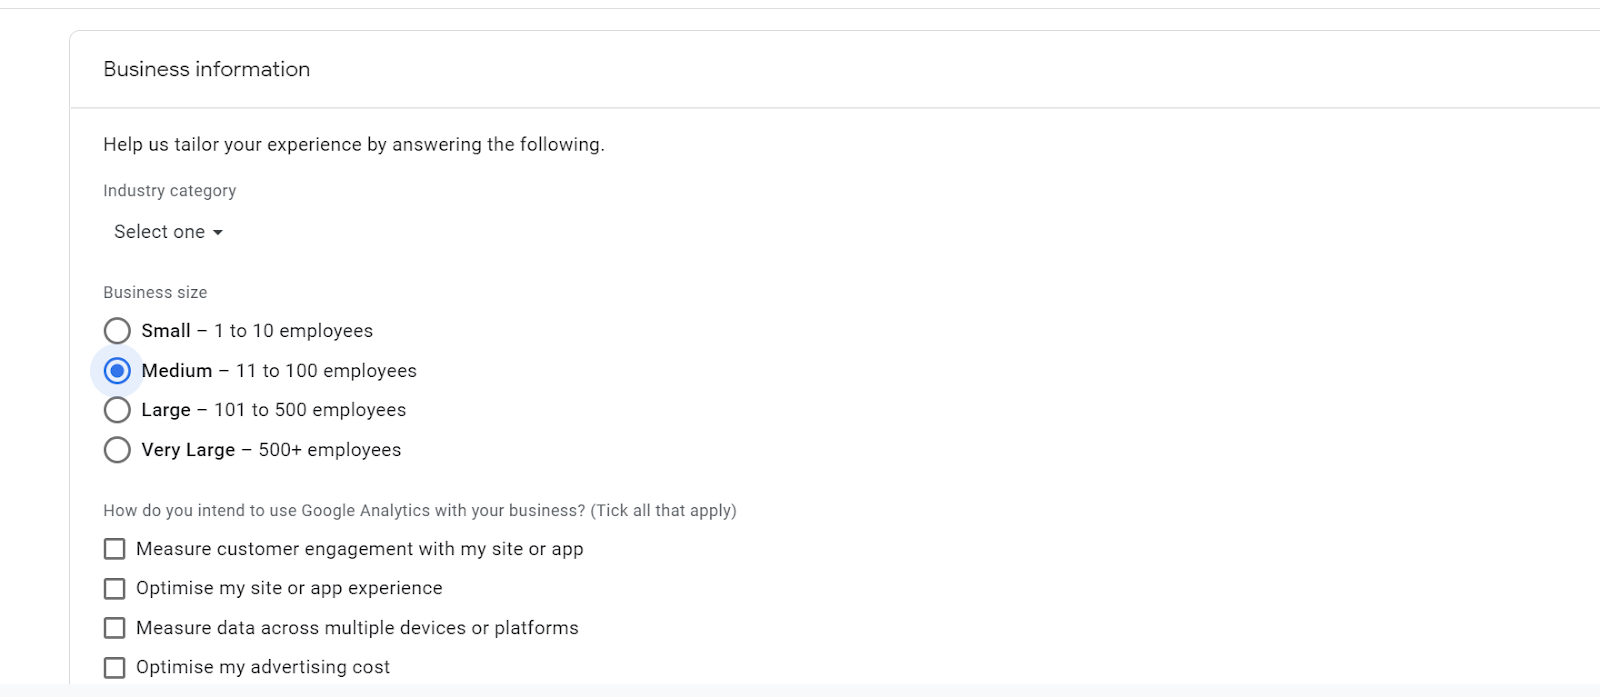
- Choose business information options from given ones
- Accept the terms
- Enter name of account and name something relevant
-
- Click on “Data Streams” and Choose web platform
- Click on “Data Streams” and Choose web platform


-
- Enter domain url and name of data stream: this is your webcastcloud URL
- Click on Create Steam Button
- Copy the measurement ID from the page
- Enter domain url and name of data stream: this is your webcastcloud URL


-
- If you want to read same Id again then you can click on “Admin” by hovering “Gear icon”
- If you want to read same Id again then you can click on “Admin” by hovering “Gear icon”

- Enter the measurement ID on create tag page
- Click on Triggering to add triggers
- Choose “All pages” trigger type
- Click on Triggering to add triggers
- To add user Properties, we need to add userid (and customerid in case of member site) properties
- Add variables for UserId and CustomerId. Following are the steps
- First click on Variables
The following 2 variables will be added:
- UserId: this is the userid for each member that is unique within webcastcloud.
- CustomerId: This is generally a customerId or memberId that is passed from an integration to webcastcloud’s for your members profile. The CustomerId may be the Id from your CRM or Association Management Software. This helps to track user data with other website and applications.
- UserId: this is the userid for each member that is unique within webcastcloud.


- Above user defined variables list. Click on New
- Follow these steps to add variable
- Add Data layer variable name. Name must be “UserId” for this filed
- Save
- Similar to this you can add CustomerId
- Now, we need to add trigger to send data to GTM to set UserId and CustomerId
- Click on Triggers
Choose “Custom Event” Trigger type - Fill fields as follow and “setUserInfo” event name should not be changed.
- Select Save
- Now, link this trigger with Tag
- Set fields and properties as per the screenshot below:
- Click on + on triggers of GA2 property
- Select “setUserInfo” trigger
- Select Save
- The following details will be displayed:
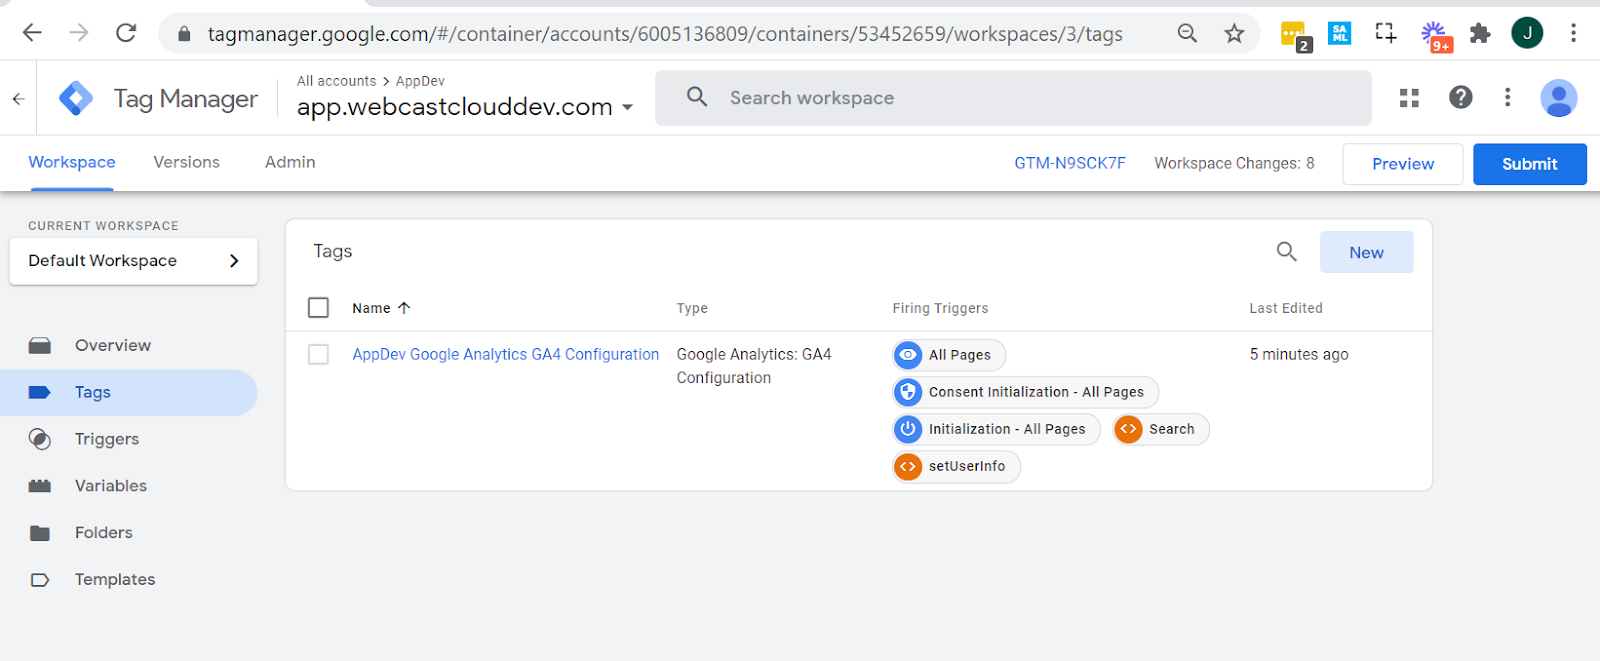
- By clicking Tags and Triggers you can see list
- You will see Tags display as follows:
NOTE: In case you had not copied the GTM ID and added to webcastcloud, it be simply copied from here: - Before you publish changes, you can review it’s working by clicking “Preview” button
- Enter your webcastcloud URL, starting with https://
for example: https://<yoursitename>.webcastcloud.com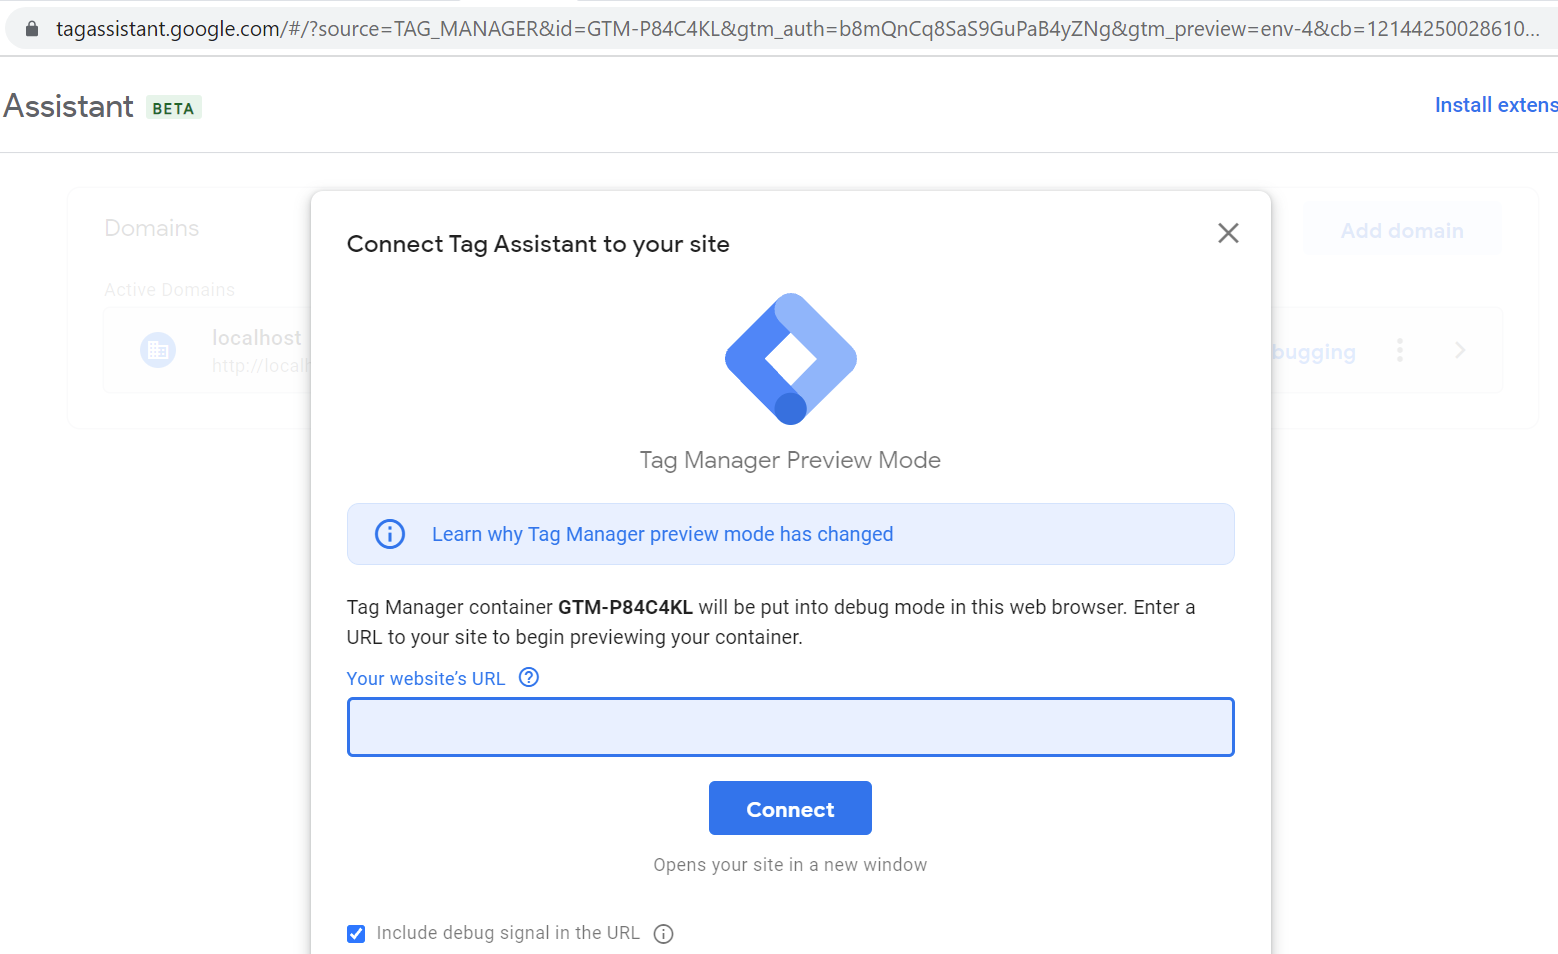
- Select Connect
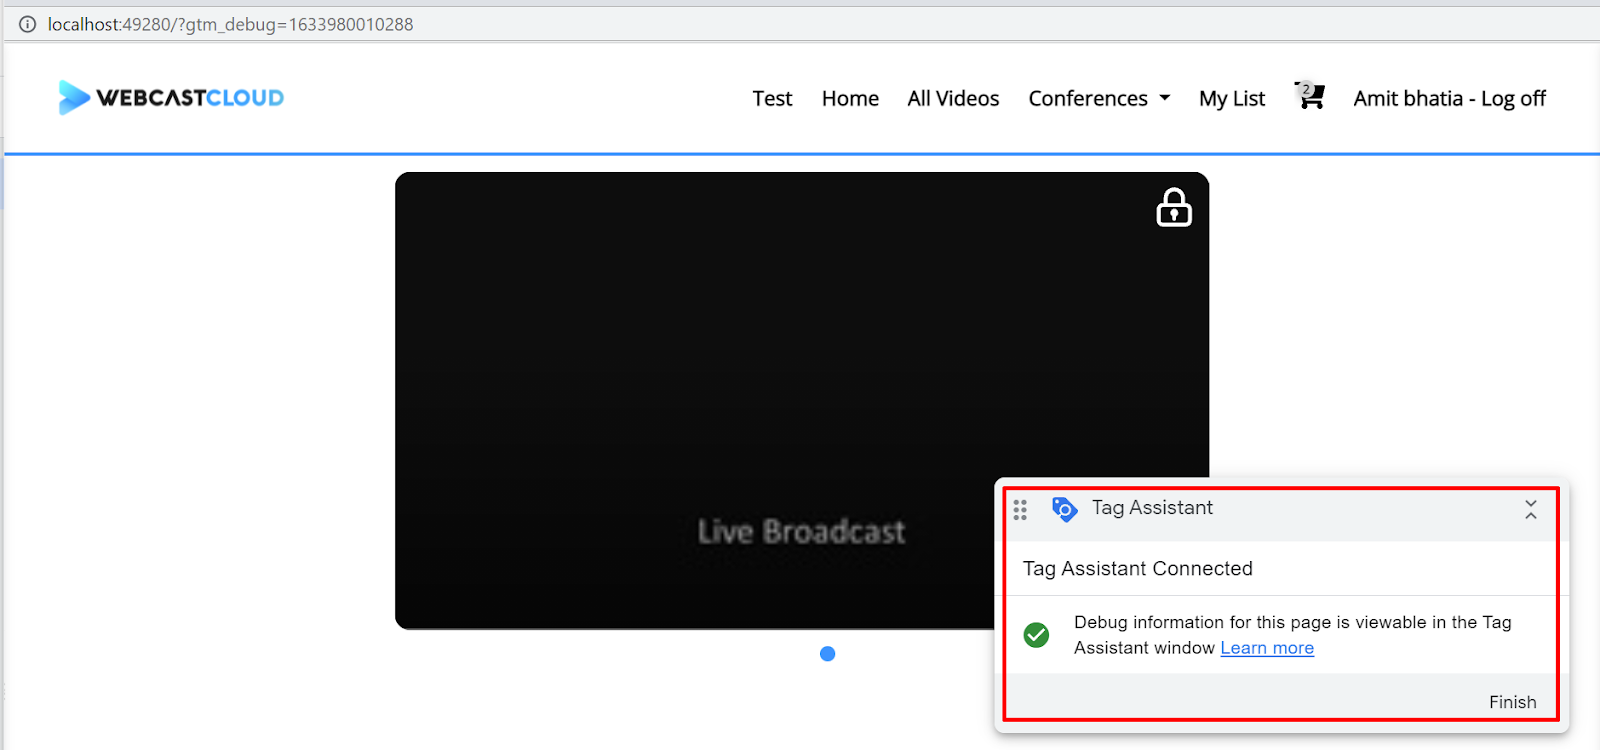
- Click on Continue to load page
- It will load your video library, where you can click on some page to review the tag manager connections are successful:
- Click on Configure button on analytics.google.com
- You can see debug view events here By clicking DebugView
- Click on Submit button to publish changes
- Set a version name and Publish your changes
- Click on Workspace to go back to list
- You can review analytics of user on clicking 1) and 2) buttons
- It shows the location of the users on map as well. Click on the blue circle on the map to view details.
- Scroll down and you can see the pages visited by the user


You will start seeing CustomerId once any other event is fired on page
How to set for Home page filter
-
First Add the variables for the search event similar to following
-
channelId
-
channelName
-
eventId
-
eventName
-
categoryName
-
tagName
-
-
Here are the name of “Data Layer variable names” those must have same name


-
Create Search Trigger with trigger type “Custom Event”.
NOTE: Please make sure then name of event to be search -
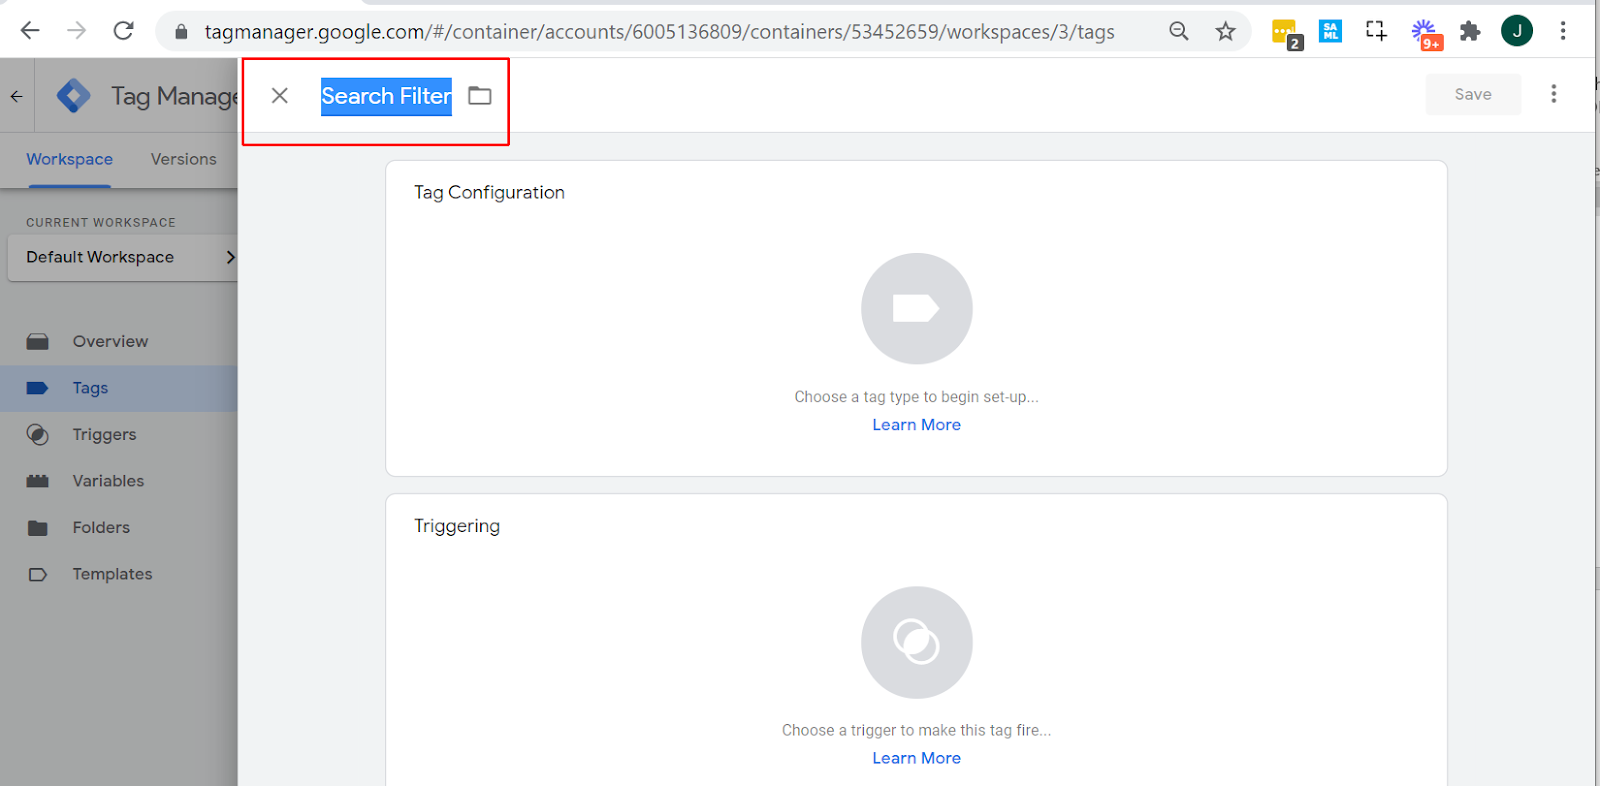
Then add tag as shown below

>Tags >New Tag
-
Name Tag: Search Filter
-
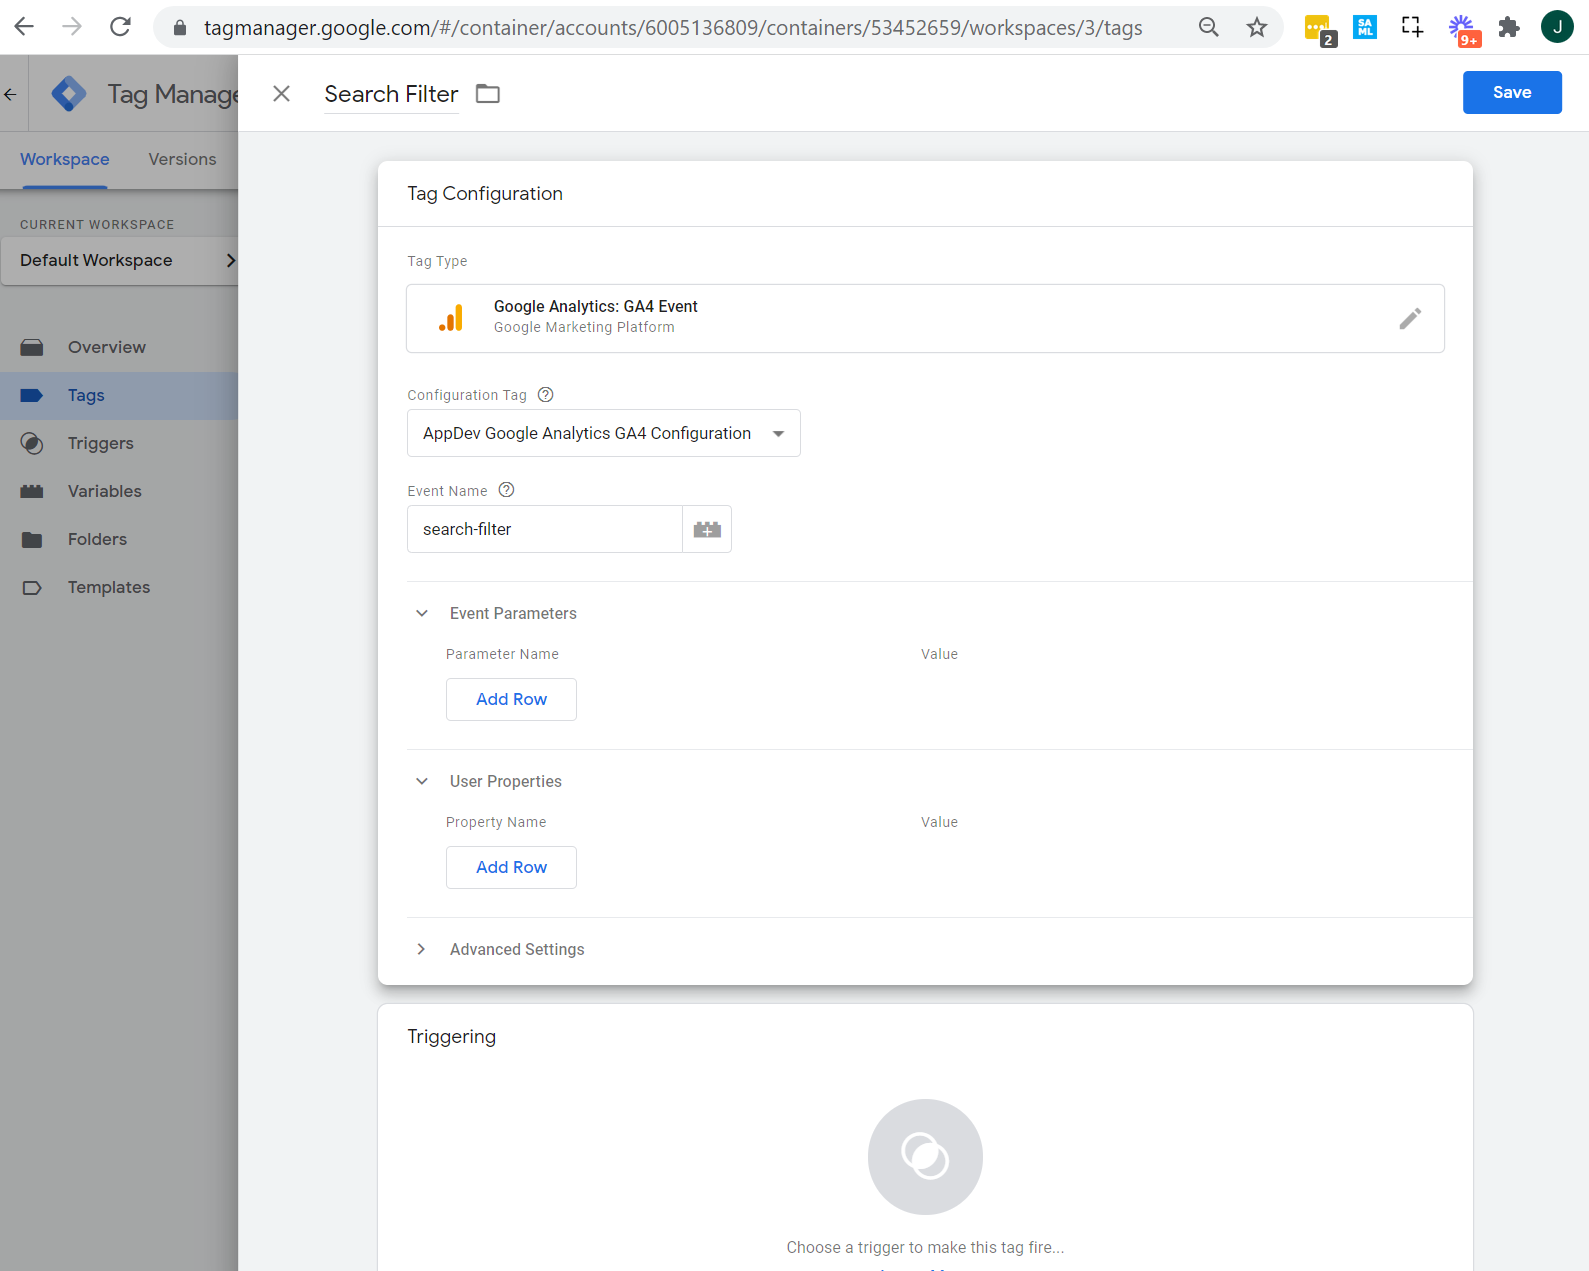
Select Tag Configuration >G4 Event
-
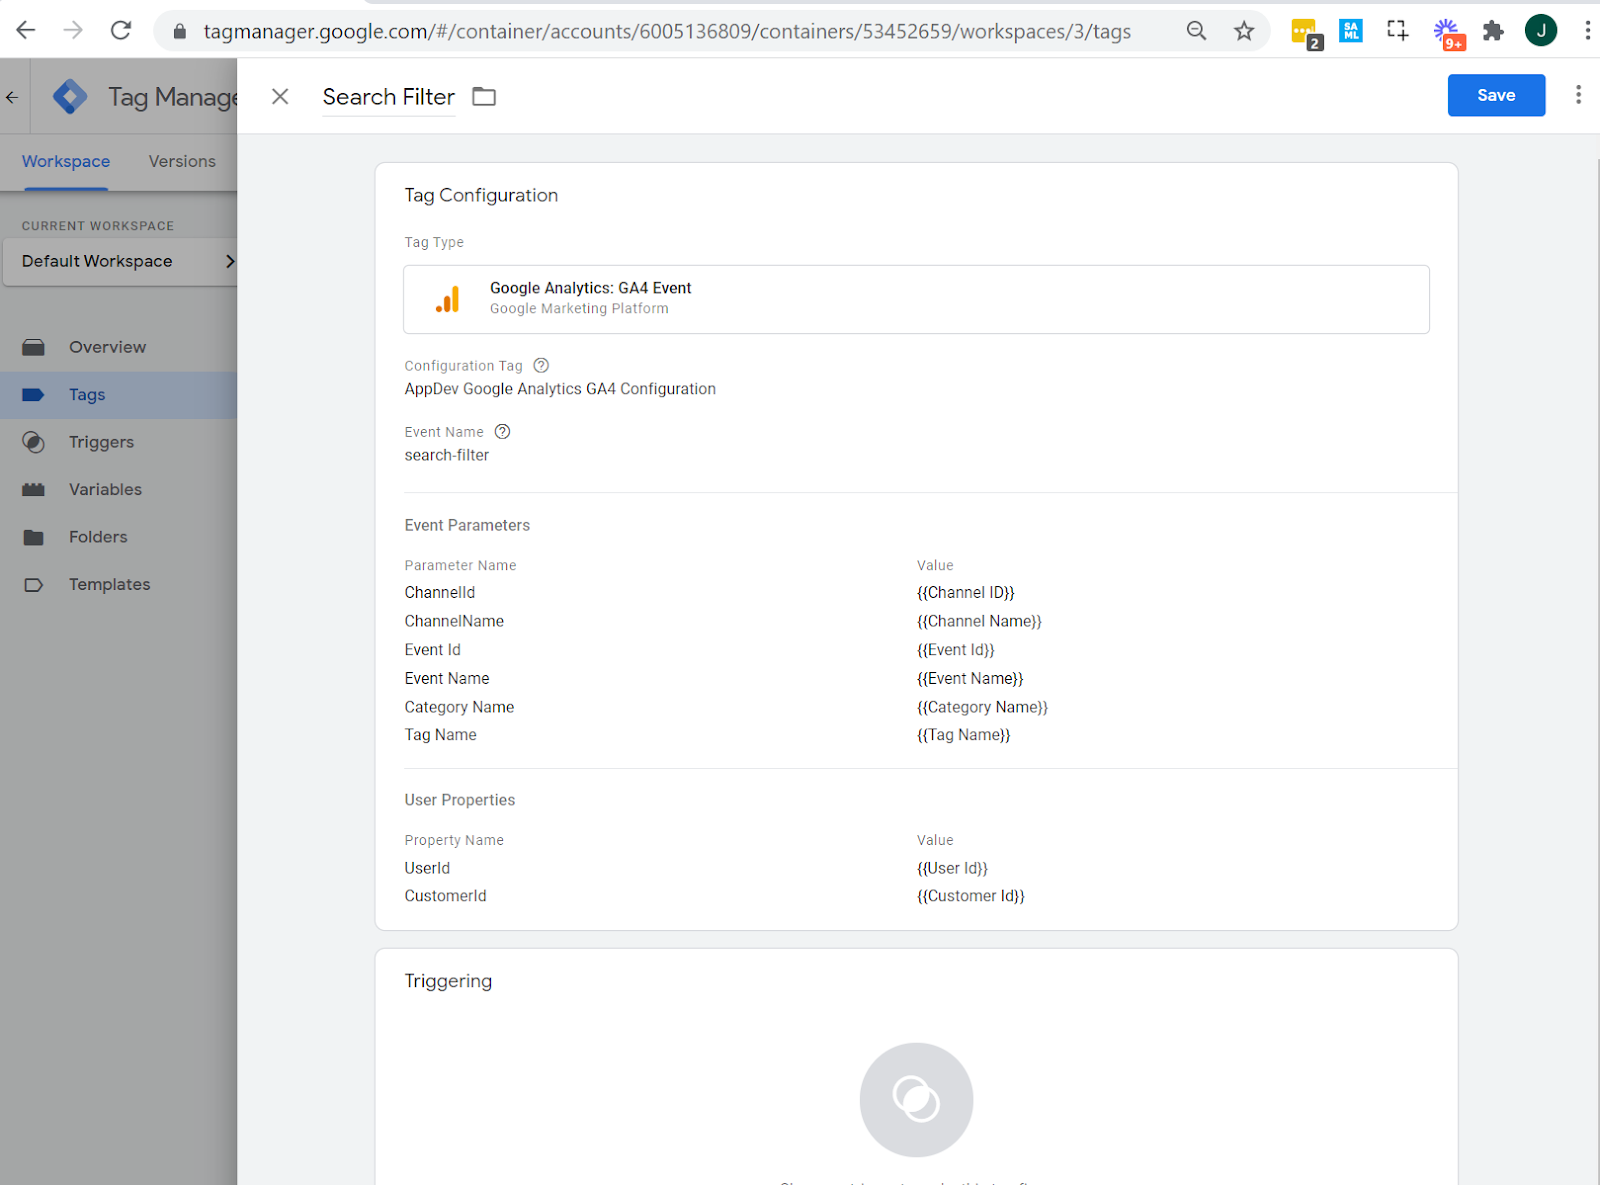
Configuration Tag: Select the Google Analytics Configuration already created

Event Name: search-filter
Add Event Parameters and User Properties:

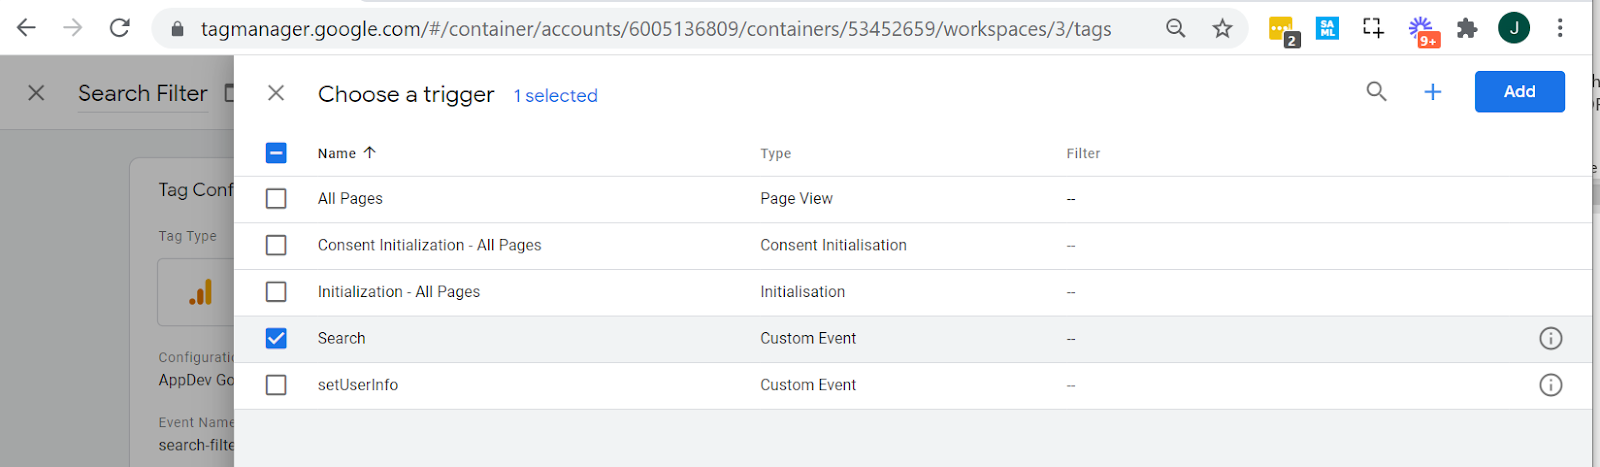
Select Triggering:

-
Select Search >Add
-
Save
Output will look like the following:

Preview


Fixes error:


Use the Debug mode, make some test searches.
The following example data should be getting captured in debug mode:


It shows on which page this is fired

Select Finish
and Submit Changes