In this article you will learn how to create a Live Stream in webcastcloud, and select options to enable cloud recording and automatic on-demand video upload.
webcastcloud LIVE allows you to deliver your live stream to viewers via your webcastcloud Channel or Live Event Stage, where all video analytics, access and ticketing is managed through your webcastcloud video library or event microsite. We have added the option to record to the cloud as well.
Plans: Live Streaming is an add-on for webcastcloud Enterprise Plans. Please contact our sales team if you wish to add live streaming and cloud recording to your subscription.
Schedule a Live Stream
- In webcastcloud Admin, select Videos >Manage Videos >Add Live Stream
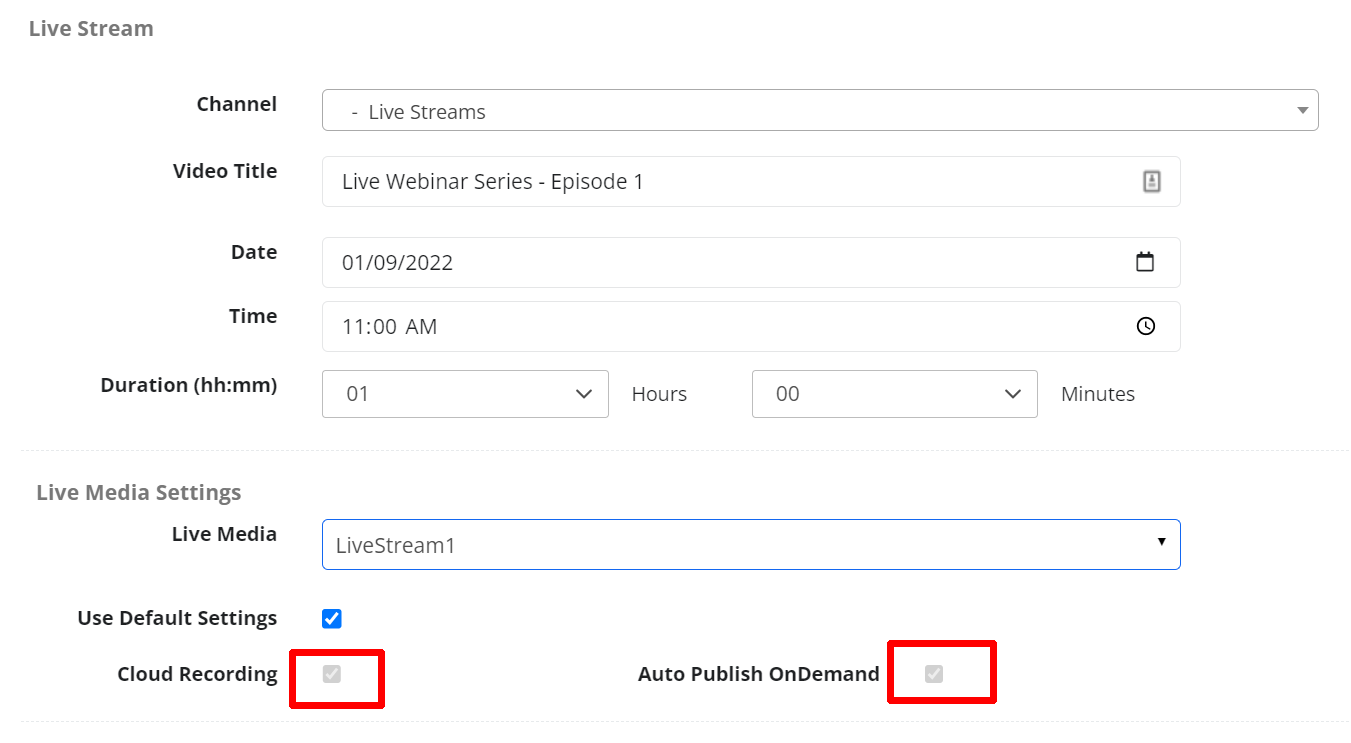
- Select the Channel your Live Stream will be available from
- Enter a Video Title
- Select the Date, Time and Duration
- Select the Live Media Channel if you have more than one live stream channel available
- Select Cloud Recording - this will record your live stream in the cloud
- Select Auto Publish OnDemand - this will move your live stream recording to OnDemand once your stream has been completed, so your viewers can watch online as soon as its available.
- Save
Your live stream is now created with cloud recording and automated on-demand viewing.
Considerations
- The cloud recording will start the moment your stream hits the server, and will end when you select End Broadcast.
- The recording will then automatically process and upload to become an OnDemand version of the live stream.
- If you are using Auto Publish, you will not need to upload your video for on-demand viewing.
- If you wish to change your Default Settings for Cloud Recording & Auto Publish to be on/off, browse to Settings >Live Stream where you can set your default live stream settings.
Run your Live Stream
To start your live stream, follow the live streaming articles below: